

Install Oracle VM VirtualBox
The first step is to download the Oracle VM Virtualbox.

Install Ubuntu Desktop
After downloading the virtual box, the next step is to install the Ubuntu Desktop.

Once the Ubuntu Desktop is installed on your PC, open the VirtualBox, configure the internal settings, and open the Ubuntu Linux in the VirtualBox.
LAMP INSTALLATION
STEP 1: INSTALL APACHE
- STEP 1: Before installing the first LAMP component, ensure the package list on the system is up to date. In order to do that, type the following command in the terminal:
sudo apt-get update- STEP 2: To install the Apache package, run the following command:
sudo apt install apache2

- STEP 3: Check if Apache is installed correctly by checking the Apache service status:
sudo systemct1 status apache2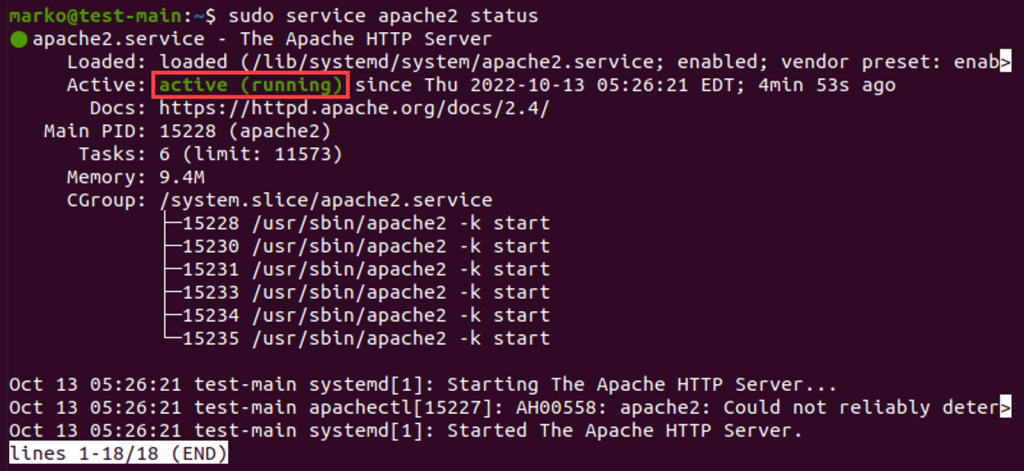
- STEP 4 : To confirm that Apache is running, type “LOCALHOST” in the search bar of the internet browser and press ENTER.
- The test Apache web server page should look like this:

STEP 2: INSTALL MySQL
- STEP 1 : Install MySQL by writing the following command
sudo apt install -y mysql-server

- STEP 2 : When the installation is finished, it’s recommended that you run a security script that comes pre-installed with MySQL. This script will remove some insecure default settings and lock down access to your database system. Start the interactive script by running :
sudo mysql_secure_installation


STEP 3: Install PHP
- STEP 1: Install MySQL by writing the following command:
sudo apt install -y php libapache2-mod-php php-mysql
- STEP 2 : Create one demo file named as info.php by writing the following command:
sudo nano /var/www/html/info.php Script Code:
<?php
phpinfo ();
?>
-> Press CTRL + X to save and close the file. Press y and ENTER to confirm
- STEP 3 : Open an internet browser and type the following address :
localhost/info.phpHere the output represents the information about the current version of PHP:

Blog published by Jay Patel
